


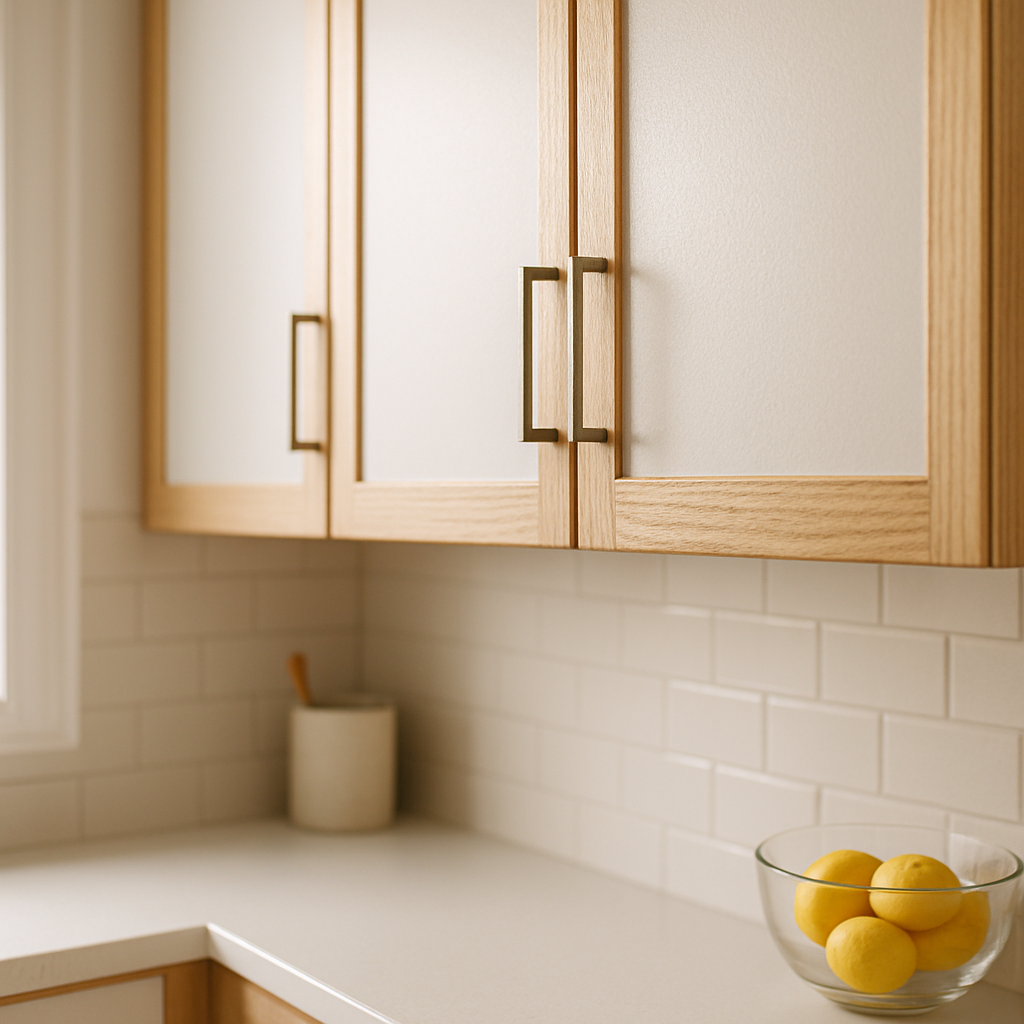
Tired of white laminate cabinets with oak trim looking old? You can update them easily. Paint the oak trim white for a modern match. Or try peel-and-stick covers if you’re renting. This costs under $50 and takes just a few hours. It fixes problems like high costs and boring styles. Perfect for homeowners on a budget or DIY fans.
Table Of Content
Why Update White Cabinets with Oak Trim?
White laminate cabinets with oak trim often come from older homes, like those built in the 1980s or 1990s. The oak can turn yellow and clash with the white, making your kitchen or bathroom feel outdated and small. But you don’t have to rip everything out. Simple updates like painting or adding new handles can make it look fresh and bright. This helps with everyday pains, such as feeling embarrassed about your space or spending too much on fixes. It’s great for boosting your home’s value without a big remodel.
Who This Guide Helps Most
Not everyone has the same needs when updating cabinets. This guide is made for specific groups who face these issues. Here’s who it helps and why:
- Budget-Conscious Homeowners: You own an older home and want cheap ways to make it nicer. This saves money and makes your space more enjoyable.
- DIY Enthusiasts: You love hands-on projects and want to learn new skills. These ideas are fun and let you customize your home.
- Home Sellers or Flippers: You’re getting a house ready to sell and need quick, eye-catching changes. This boosts appeal to buyers.
- Renters in Older Apartments: You live in a rental with ugly cabinets but can’t make big changes. These tips are temporary and safe for your lease.
Each section below ties back to these groups, solving their unique challenges.
Pain Points and How We Solve Them
Old cabinets cause real headaches. Based on who you are, here are key challenges and how this guide fixes them. We focus on easy, affordable solutions.
- Budget-Conscious Homeowners:
- Pain: Professional help or new cabinets cost thousands, which you can’t afford.
- Pain: The mismatched oak and white make your home feel old and uninviting every day.
- Solution: We share low-cost DIY methods, like using household items, to refresh without breaking the bank.
- DIY Enthusiasts:
- Pain: Many guides are too hard for beginners, leading to mistakes like uneven paint.
- Pain: Projects take forever due to trial-and-error, eating up your weekends.
- Solution: Clear steps with tips and photos help you avoid errors and finish quickly.
- Home Sellers or Flippers:
- Pain: You need fast updates to impress buyers, but time is short.
- Pain: Oak trim doesn’t match hot trends like sleek white kitchens, turning off potential sales.
- Solution: Quick ideas that follow current styles, with before-and-after examples for staging.
- Renters in Older Apartments:
- Pain: Lease rules ban permanent changes, or you risk losing your deposit.
- Pain: The space feels impersonal, like it’s not really yours, which can be depressing.
- Solution: Reversible tricks, like stick-on trims, let you personalize without any damage.
Step-by-Step DIY Updates
Follow these steps to update white cabinets with oak trim. Each one is simple and can be done alone if you want. Gather basic tools like paint, a brush, and sandpaper first. Total time: 2-6 hours depending on the method.
- Clean and Prep the Surfaces: Start by washing everything with warm soapy water to remove grease and dirt. Let it dry fully. Lightly sand the oak trim with fine sandpaper to help paint stick better. This step prevents peeling later.
- Paint the Oak Trim: Choose a white paint that matches your cabinets. Apply a primer first for laminate areas. Use two thin coats of paint, waiting 1 hour between each. This creates a seamless, modern look without the oak showing through.
- Add or Swap Hardware: Remove old knobs or pulls with a screwdriver. Pick new ones in black or silver for a trendy vibe. Screw them in tightly. This small change makes a big difference in style.
- Use Peel-and-Stick Options: For a no-paint fix, buy adhesive trim covers or contact paper in white. Cut to fit and stick over the oak. It’s easy to remove later, ideal for temporary updates.
- Finish with Sealant and Touches: Apply a clear sealant over painted areas to protect from water and scratches. Add extras like under-cabinet lights for a brighter feel.
Pro tip: Test paint on a small spot first to check the color.
Pros and Cons of Common Updates
Not sure which method to pick? This table compares them. It shows what’s good and bad, plus who it’s best for. Use it to decide based on your time and budget.
| Update Method | Pros | Cons | Best For | Estimated Cost |
|---|---|---|---|---|
| Painting Trim | Cheap materials, quick to do, gives a fresh modern look | Needs drying time (up to 24 hours), might chip if not prepped well | Budget Homeowners, DIY Enthusiasts | $20-40 |
| New Hardware | Super easy swap, creates a big style change instantly | Good hardware can add up if you need many pieces | Home Sellers, Quick Fixes | $10-30 |
| Peel-and-Stick Covers | No damage to originals, fully removable, no tools needed | May not last as long in humid areas like kitchens | Renters, Temporary Use | $15-25 |
| Full Trim Replacement | Looks professional and lasts years | Expensive wood, requires cutting tools and skills | Flippers with Budget | $50-100+ |
Pick painting if you’re on a tight budget, or peel-and-stick if you can’t commit.
Tips Tailored to You
These extra tips are just for your group. They build on the pain points to make updates even easier.
- For Budget-Conscious Homeowners:
- Look for paint sales at hardware stores to keep costs under $20.
- Reuse items like old brushes to avoid buying new tools.
- Focus on high-impact areas like kitchen cabinets first for the best value.
- For DIY Enthusiasts:
- Take photos at each step to track your progress and share online.
- Try mixing paint colors for a unique shade that fits your style.
- Join online forums for free advice if you get stuck.
- For Home Sellers or Flippers:
- Choose neutral colors like soft white to appeal to most buyers.
- Time your updates for open houses—fresh paint smells inviting.
- Add simple staging like plants to show off the new look.
- For Renters in Older Apartments:
- Use washi tape or magnetic strips for edges— they peel off without marks.
- Add inside organizers like adhesive hooks for more storage space.
- Check with your landlord first for any easy approvals.
Common Mistakes to Avoid
Even simple projects can go wrong. Here’s how to skip them:
- Skipping Prep: Always clean and sand, or paint won’t stick.
- Rushing Drying Time: Wait fully, or you’ll smudge your work.
- Wrong Materials: Use laminate-friendly paint to avoid bubbles.
- Overdoing It: Start small—one cabinet at a time—to test.
This keeps your update smooth and stress-free.
Final Thoughts: Start Your Update Today
Now you know how to revamp those white oak cabinets easily. Choose a step that fits your life and get started. It could change your whole space! If you have questions or share your results, comment below. For more home tips, see our guides on budget kitchen makeovers.


No Comment! Be the first one.